A Follow-Up Run Reached First Place
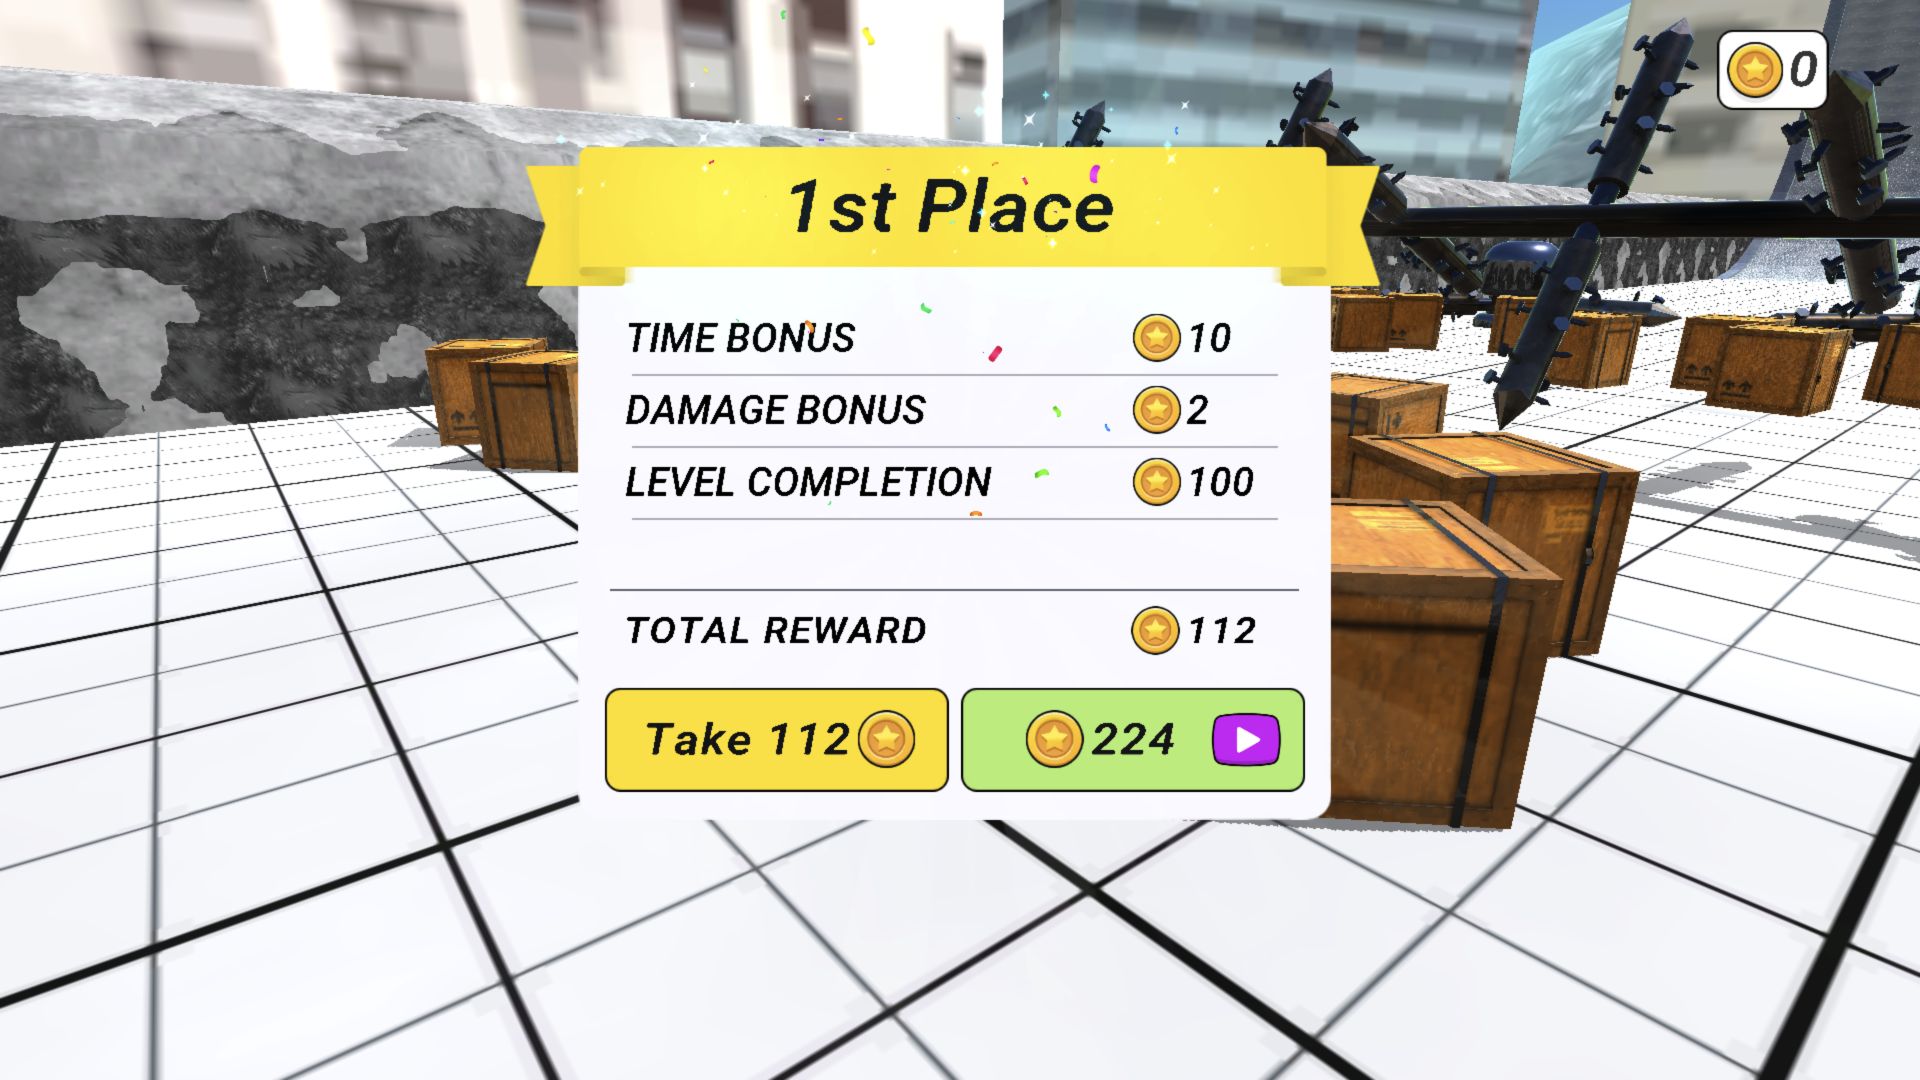
My original Deadly Descent session ended with the sedan on its side. A September 9 desktop retest changed the verdict: after a separate brake experiment and another start, I reached a first-place result with a total reward offer of 112 coins. The useful comparison is now between a failed drive, a low-speed control check, and one completed course. It still does not establish consistent success or the difficulty of later levels.
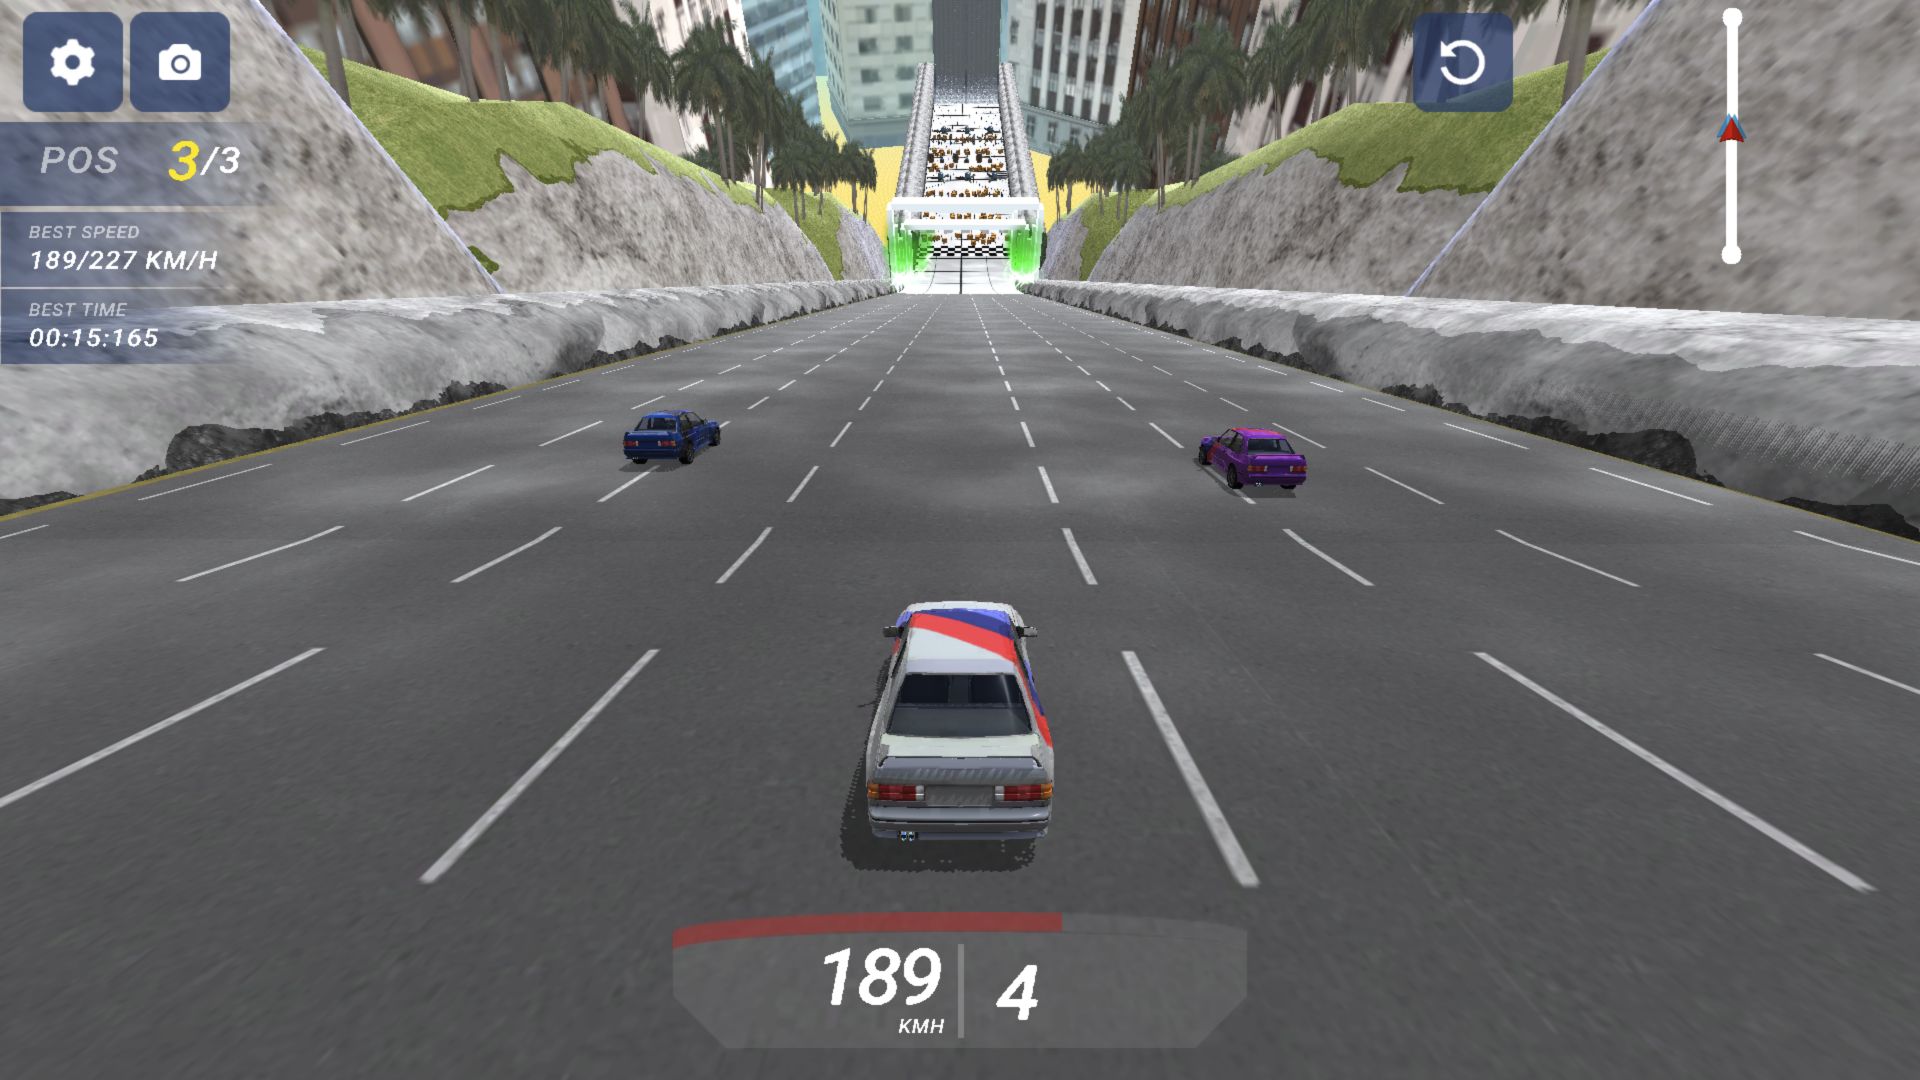
The successful attempt used a wide rear camera and repeated short W presses on the opening straight, followed by coasting without further steering input. A moving capture shows 189 KMH and position 3 of 3 before the obstacle field. The next recorded state is the first-place settlement. I did not capture the intervening obstacle crossings, so I cannot turn that outcome into a precise lane-by-lane walkthrough or claim a clean, damage-free run.
All new evidence comes from a 1920-by-1080 desktop browser viewport using discrete browser-level keypresses. These are not measurements of holding a physical key continuously. I used the provider-hosted standalone game for the retest; the older launch and advertising observations below come from the earlier provider flow. Neither session establishes physical-phone handling.
The Controls Are Simple, but the Car Is Not Gentle
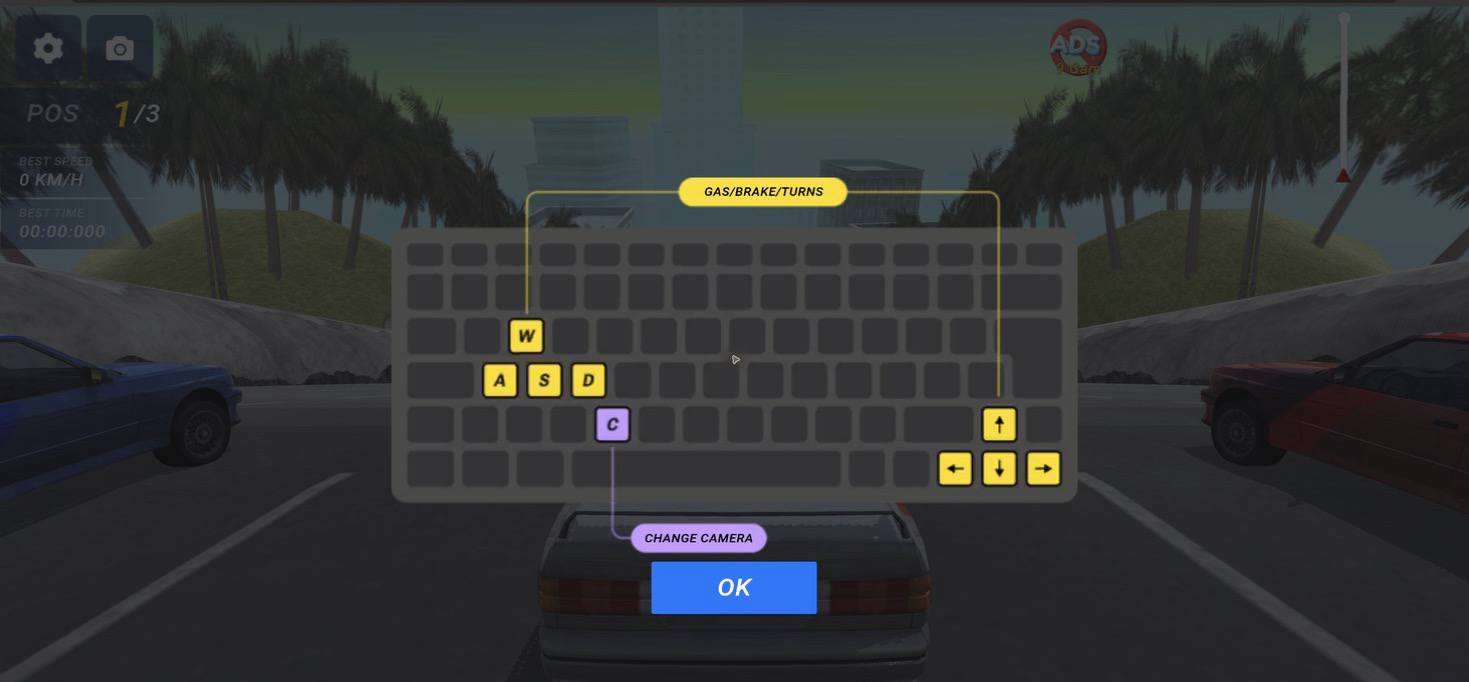
The tutorial maps W or the up arrow to gas, S or the down arrow to brake, A/D or the left/right arrows to steering, and C to the camera. The September test checked more than the labels: repeated W presses moved the car forward, and a separate sequence of S presses changed its motion and gear indication. The controls need little memorization, but the slope gives you little reason to keep accelerating blindly.
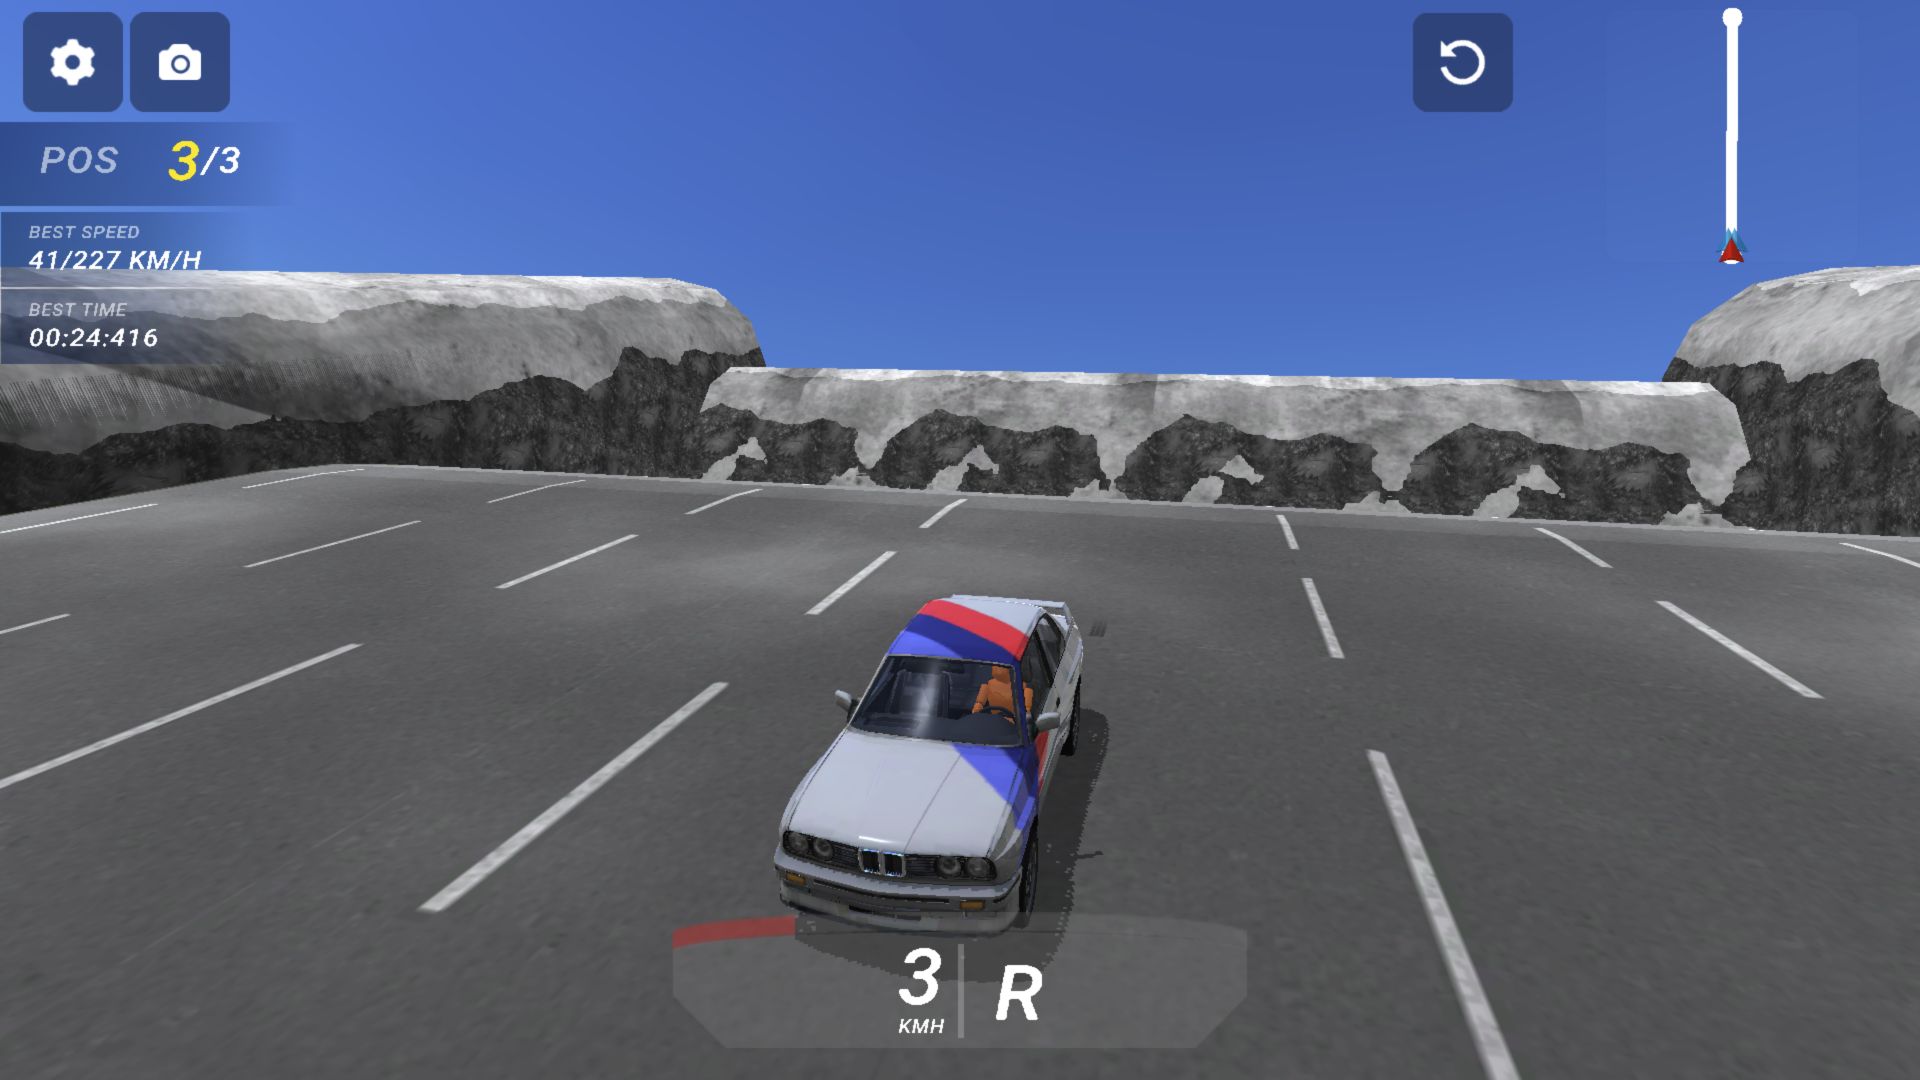
In that separate low-speed trial, the frame immediately before the S sequence showed 33 KMH in first gear. After repeated S presses, the next frame showed 3 KMH and R, with the view looking back toward the uphill rock face. This supports a specific warning: the brake input can continue into reverse. It does not establish stopping distance, an ideal braking duration, or the maximum speed at which a turn is safe.
For an initial control check, use the open road near the grid and watch the gear indicator as well as the speed. Once the car slows, release S if you intend to continue downhill; an R indicator means the test has gone past simple forward deceleration. This recommendation follows the observed reverse state. I have not demonstrated that braking at any particular landmark prevents the earlier rollover.
The Brake Test Ended in Reverse
This was the most useful correction to my original first impression. Keeping the braking input going can change travel direction. For someone learning the opening, that makes the gear readout a more useful cue than simply watching scenery move. The screenshot records the end of that trial, not a successful emergency stop at the obstacle field.
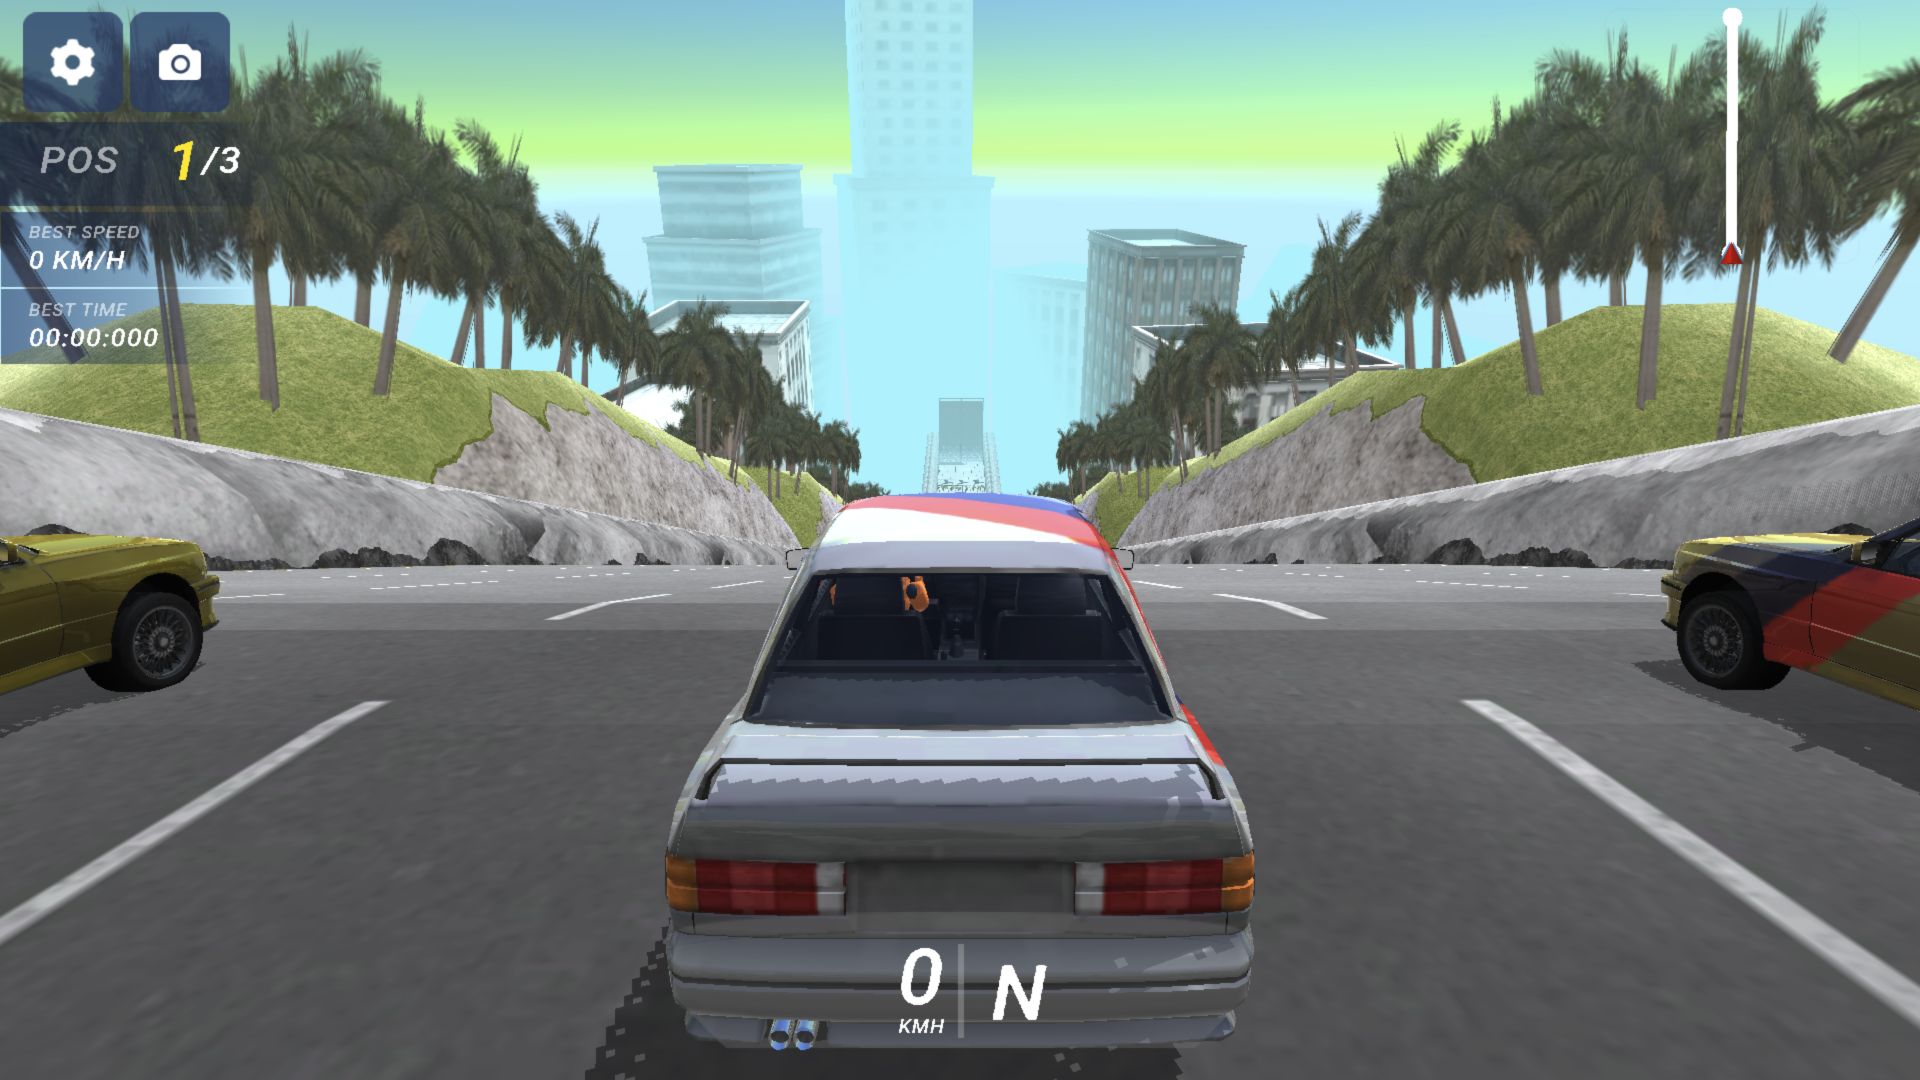
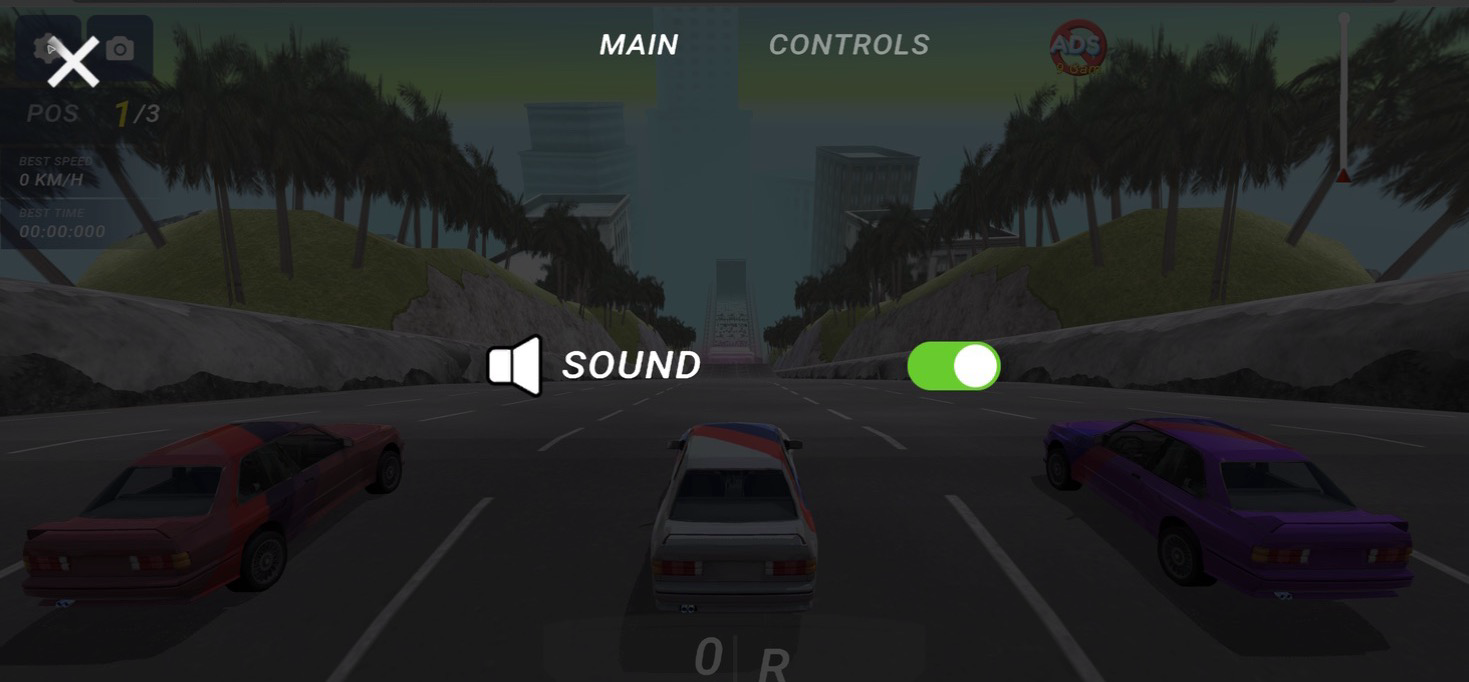
The wide camera exposed both rivals and more of the lane boundaries than the close starting view. I used it in the completed attempt because I preferred that framing. The close and wide starts were separate runs, with different rival colors, and I did not perform matched moving runs with both cameras. Extra visible road is an observed presentation difference; a better finishing time from that camera is not established.
The successful acceleration sequence and the brake trial should not be joined into a continuous drive. They answer different questions: one shows that the opening course was finishable in this session, while the other demonstrates reverse after repeated braking input. Neither alone identifies the safest line through the rotating obstacles.
Correcting the Original Crash Interpretation
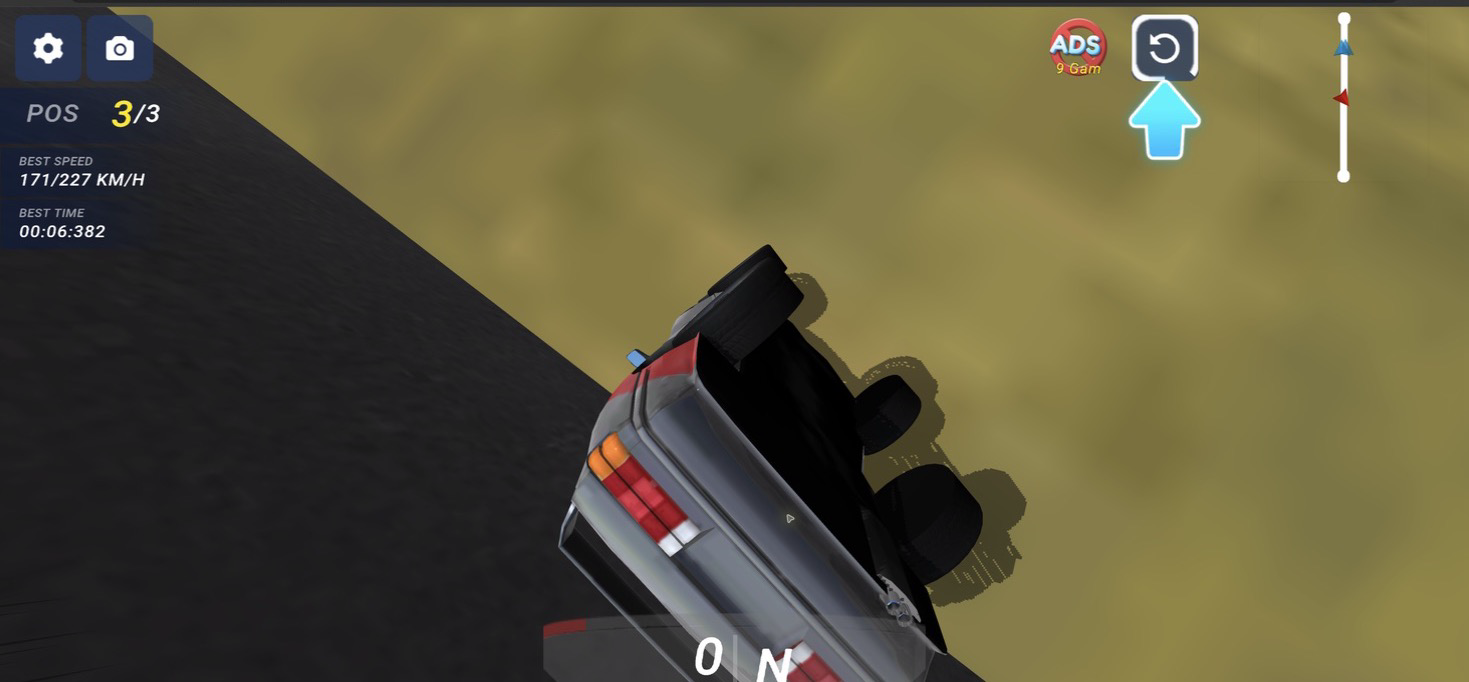
The older screenshot shows the sedan on its side, zero current speed, position 3 of 3, and the label BEST TIME beside 00:06:382. The original article treated that number as a measured 6.382-second run. The retest showed that the live time display changes during a run, and I did not independently time the older attempt. I have removed the elapsed-time claim. The rollover is supported by the image; an exact duration is not.
The same caution applies to the older BEST SPEED 171/227 KM/H line. It is a visible HUD reading, not proof of a physical speed limit or a comparison against another player. The September moving frame shows 189 KMH while the sedan is upright. These images demonstrate different states, but differences in input sequence and camera timing prevent a controlled handling comparison.
A rollover does not mean the starting course is impossible, and one first-place finish does not identify which mistake caused the rollover. Judge the car by a short control trial before committing to the descent. Keep the failed image as evidence of what happened rather than treating its unexplained labels as a stopwatch.
The Ad Friction Is Hard to Ignore
I reached the game without creating an account. The larger interruption was advertising. I encountered an interstitial during startup, another transition around the tutorial and race flow, and an in-game prompt about removing ads. I did not create an account or purchase anything during this test.
The September standalone retest reached a completion panel with a normal Take 112 button and a separate 224 option marked by a video icon. I activated neither, so 112 is the displayed reward offer, not a verified wallet increase. This adds a concrete post-finish ad choice to the earlier launch observations. Advertising frequency can differ between the provider page and standalone build; these sessions do not support an ads-per-run average.
I opened two settings tabs. Main showed a sound on/off switch, and Controls repeated the keyboard map. Those are the options I directly observed; I did not verify every possible menu, platform build, or hidden setting. Based on the visible tabs, the tested interface prioritizes getting back to the run rather than presenting a detailed vehicle setup screen.
Who This Opening Course Actually Suits
The settlement separated time bonus 10, damage bonus 2, and level completion 100, adding up to 112. That gives the next attempt clearer targets than the old crash image alone. It does not explain the scoring formula, and I did not claim a doubled reward or test whether coins improve a car. The result supports completion of this opening course, not a verdict on the entire progression system.
Deadly Descent is worth a try for players who want a dramatic downhill course, visible physical mishaps, and a quick opportunity to experiment with gas, brake, and camera framing. In my successful attempt, the spectacle came from building speed on the long straight and reaching a settlement, rather than from carefully passing traffic. A player looking for a precise racing tutorial will get less help: the controls card does not teach a braking line, and the HUD labels need cautious interpretation.
My practical starting advice is to choose a readable camera before moving, briefly check what S does near the grid, and watch for reverse rather than assuming more braking is always safer. Then treat the first descent as a route-learning attempt. I would not recommend it on the promise of deep vehicle tuning, reliable high-score strategy, or an uninterrupted session: those features were either untested or contradicted by the advertising friction I actually saw.