My First Run Lasted 6.382 Seconds
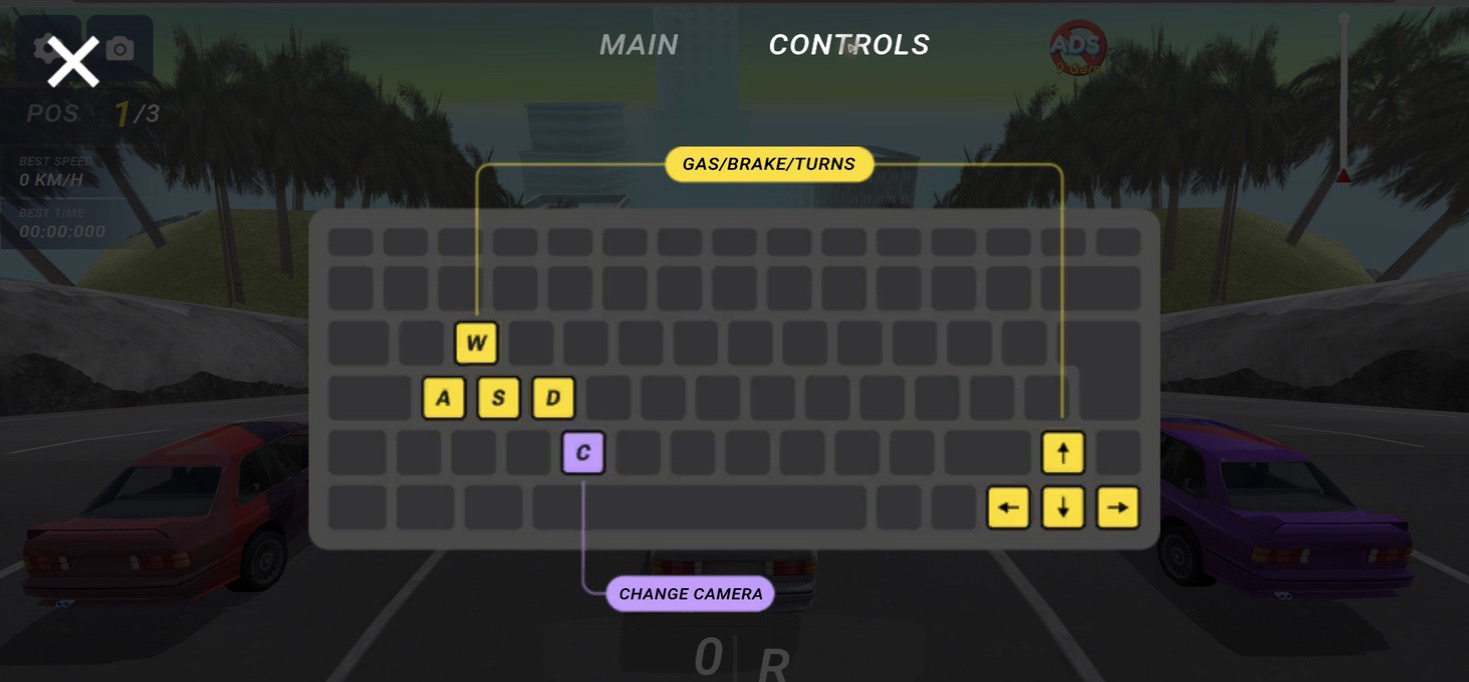
My first proper Deadly Descent attempt was short enough to fit inside a breath. After the Playgama launch screen, a startup interstitial, and the control tutorial, I arrived at a three-car starting line in a white sedan with red-and-blue paint. The road fell sharply toward a distant city, with palm trees, concrete banks, a pink-lit ramp, and a dense field of obstacles visible far ahead.
The stationary HUD called me position 1 of 3, although the blue car on the left and the red car on the right had not moved yet. I pressed W repeatedly after the start. That input was enough to turn the calm zero-speed scene into a very short run, and I gave myself almost no time to read what waited beyond the first drop.
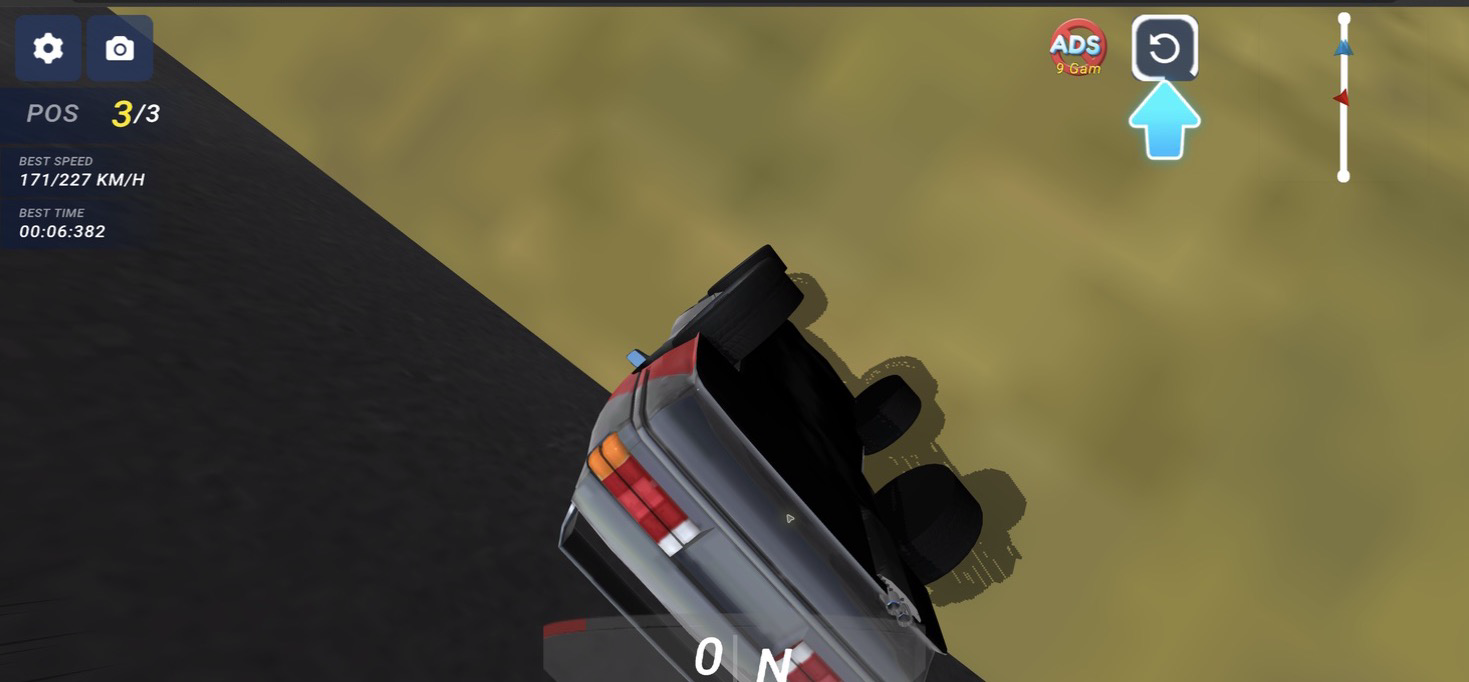
The result was honest and ugly: I did not reach the finish. At 00:06:382 the car was lying on its side against the edge of the course, the position display had fallen to 3 of 3, and the HUD showed “BEST SPEED 171/227 KM/H.” I would not describe one failed attempt as a complete test of the handling model. The screenshots therefore document setup, controls, separate start views, and the crash rather than pretending I captured a successful mid-course drive.
The Controls Are Simple, but the Car Is Not Gentle
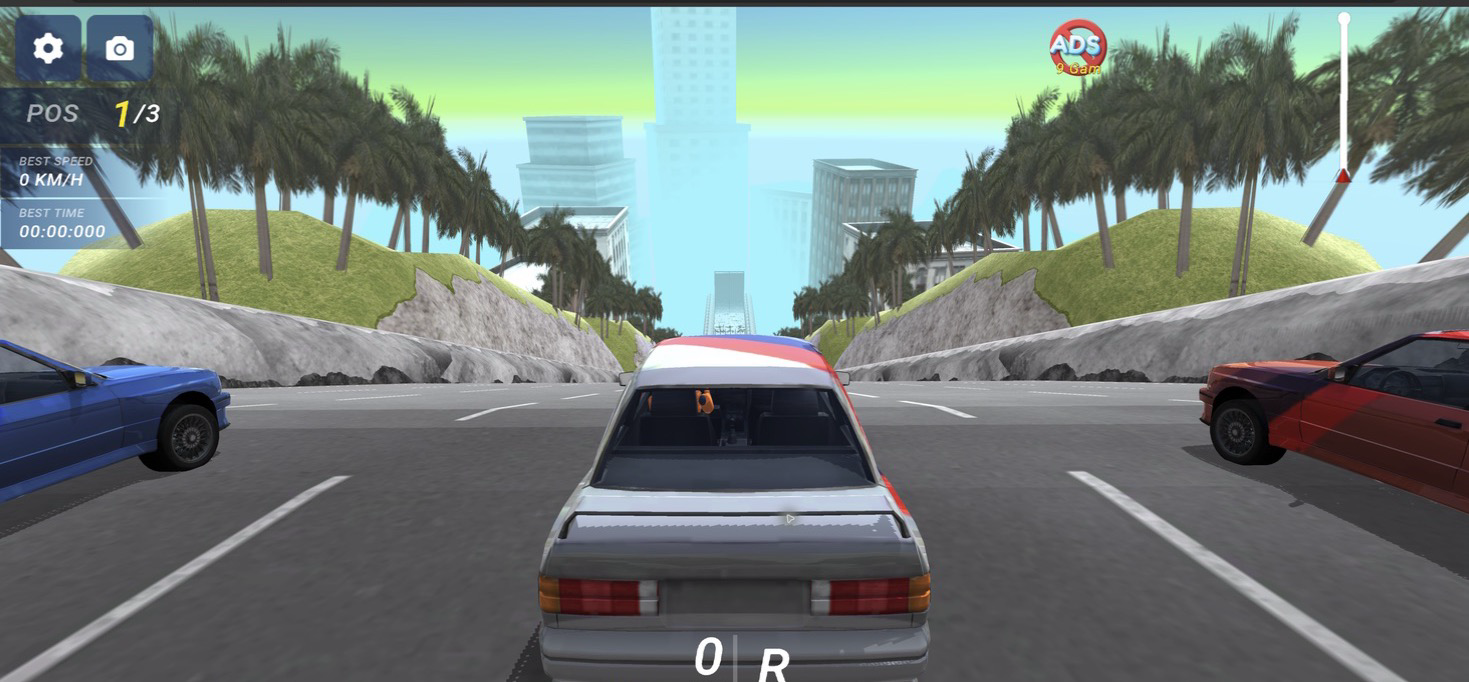
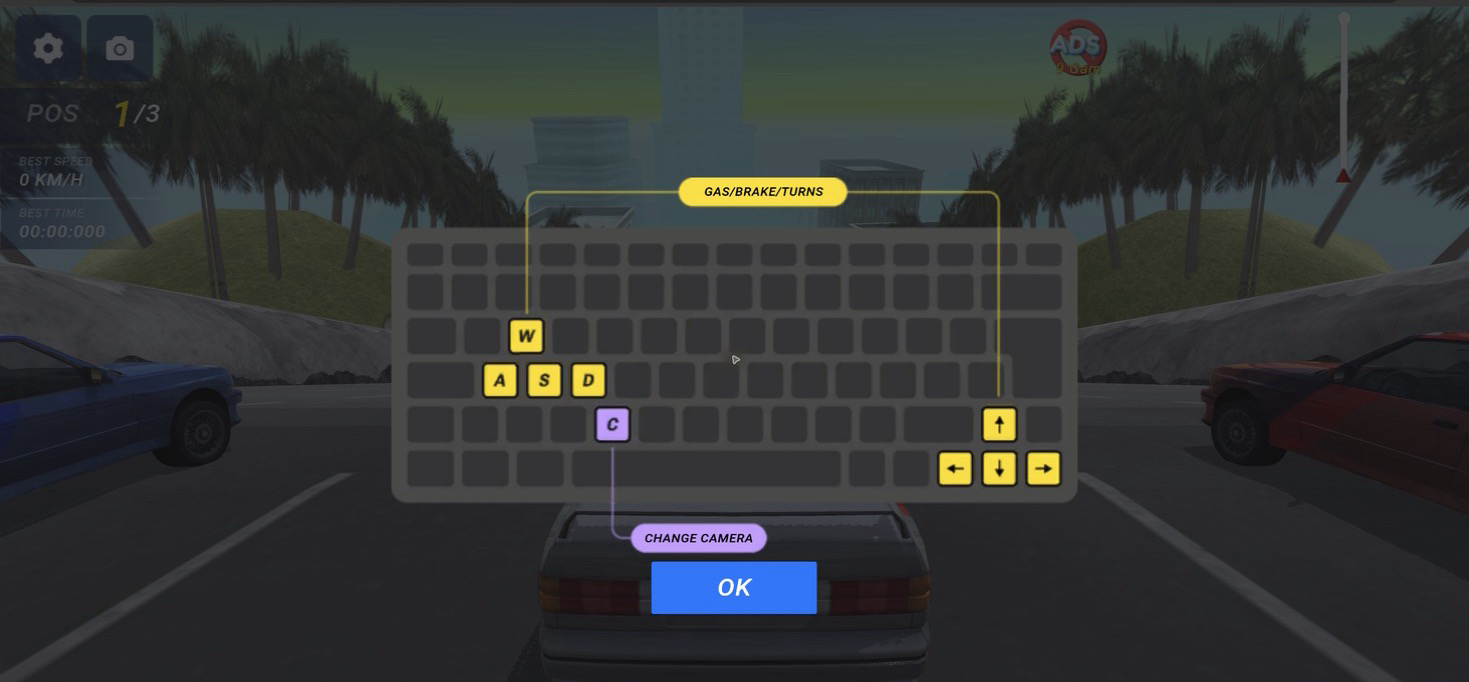
The tutorial is clear about the keyboard layout. W or the up arrow handles the gas, S or the down arrow is the brake, and A/D or the left/right arrows steer. C changes the camera. There is no long explanation of traction, transmission, damage, or racing lines. Deadly Descent gives you the basic inputs and lets the slope demonstrate the rest.
The camera command responded immediately in my test. I also confirmed that repeated W inputs were enough to take the car from a stationary start to a crash in 6.382 seconds. I did not complete a separate controlled braking test, so I cannot honestly say how early the brake needs to be applied or how quickly it sheds speed.
The course looks wide near the start, but the distant view includes ramps, barriers, and tighter-looking lanes. Because my first run ended before I could compare clean steering lines, I cannot claim which lane is safest or how forgiving the car is farther down. The useful next test would be deliberately modest: accelerate in shorter bursts, try S well before the first obstacle zone, and compare that result with the all-forward opening.
The Wider Camera Exposed More of the Route
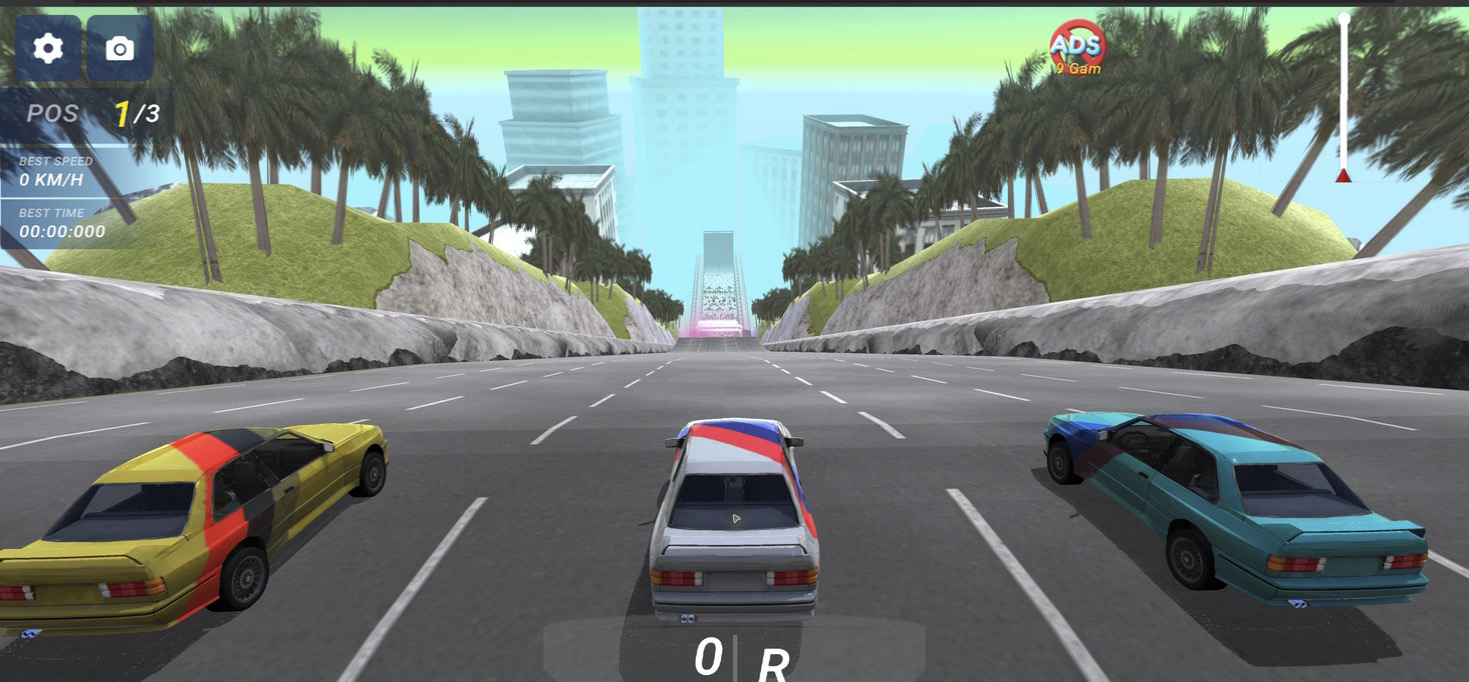
Deadly Descent starts with a close rear camera that makes the sedan feel large and heavy. It is a dramatic view, but the car occupies a lot of the screen. Pressing C changed to a much wider third-person angle in my session. The close and wide screenshots were captured from separate starts, so the rival colors are not a continuous sequence; the useful comparison is the amount of road visible in each framing.
From the stationary line, I preferred the wider camera because it exposed more of the route in one frame. The close view made the sedan feel larger, while the wide view revealed more lane boundaries and the two rivals. There was no conventional minimap in the screen I tested; a slim vertical indicator appeared on the upper right instead.
I did not complete a moving, side-by-side comparison of both cameras, so it would be misleading to say the wide angle improved my time or prevented a crash. My next attempt would still begin wide because the extra visible road looked useful before launch. That is a testable preference, not a proven performance tip, and the close camera may suit players who judge the car's body movement more comfortably at a larger scale.
What the Crash Screen Actually Told Me
The failure state did not hide the car behind a generic message. The sedan remained in the scene on its side, the speed had dropped to zero, and a large restart arrow appeared near the top of the screen. Seeing the failed vehicle and the recorded numbers together made the outcome more concrete than a plain “game over” panel would have been.
The HUD also preserved the evidence of the attempt: third place, the 00:06:382 time, and the 171/227 KM/H speed line. I am deliberately reporting those labels as they appeared because the slash notation is not explained in the tutorial. What is clear is that the game records more than whether you finished. Even a failed run leaves a measurable result and an obvious target for the next attempt.
One run does not establish the exact cause of a physics failure. I know that I used repeated forward inputs, changed the camera, and ended on the car's side; I did not run controlled comparisons for steering or braking. On another attempt I would release the gas earlier and test the brake before the obstacle zone becomes urgent. That plan follows from the failure, but it remains a hypothesis until another run produces a better result.
The Ad Friction Is Hard to Ignore
I reached the game without creating an account. The larger interruption was advertising. I encountered an interstitial during startup, another transition around the tutorial and race flow, and an in-game prompt about removing ads. I did not create an account or purchase anything during this test.
That friction matters more after seeing how short a failed run can be. My recorded attempt ended in a little over six seconds, while launch and transition interruptions occupied a noticeable part of the first session. I did not measure their duration or a large sample of restarts, so I cannot give a reliable ads-per-run figure. I can only say that the pre-run interruptions were prominent enough to shape my first impression.
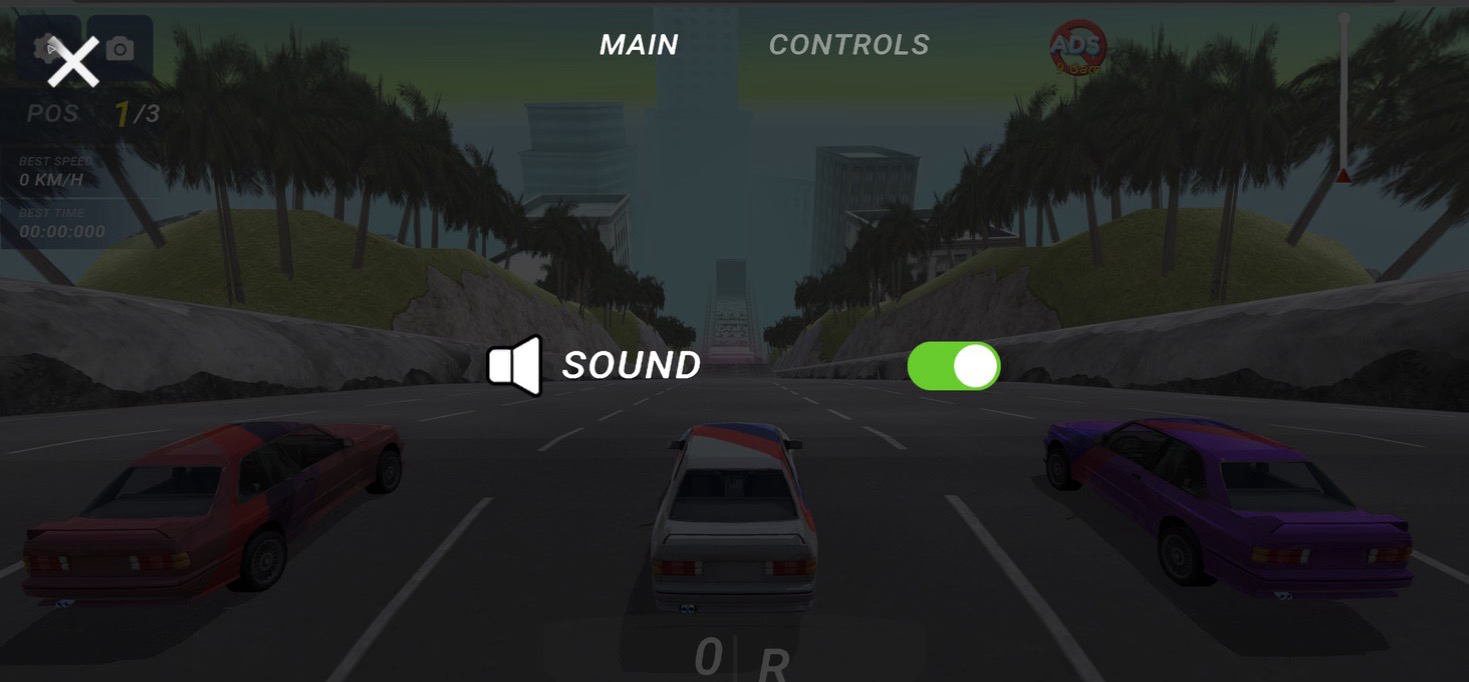
I opened two settings tabs. Main showed a sound on/off switch, and Controls repeated the keyboard map. Those are the options I directly observed; I did not verify every possible menu, platform build, or hidden setting. Based on the visible tabs, the tested interface prioritizes getting back to the run rather than presenting a detailed vehicle setup screen.
How I Would Drive the Next Run — and Who Should Play
My next-run plan has three changes: switch to the wide camera before moving, replace the repeated forward presses with shorter bursts, and test the brake while the obstacle pattern is still distant. These are not proven beginner tips from a completed course. They are the specific experiments suggested by a 6.382-second failure, and I would judge them by whether the next attempt lasts longer and keeps the car upright.
From the material I actually reached, Deadly Descent looks best suited to someone who enjoys arcade driving, sudden failure, and the comedy of seeing a bad run remain on screen. The steep city course has an exaggerated scale, the basic controls take only a moment to read, and the three-car start provides an immediate competitive frame even though I never reached the finish.
It is a weaker first impression for anyone seeking a calm drive, a deeply configurable vehicle, or a session with little advertising. My hands-on result was failure rather than a finish, and the pre-run interruptions were the most noticeable friction. The test still left a concrete question for another attempt: not whether I had solved the course, but whether earlier braking and less aggressive acceleration would change the outcome.